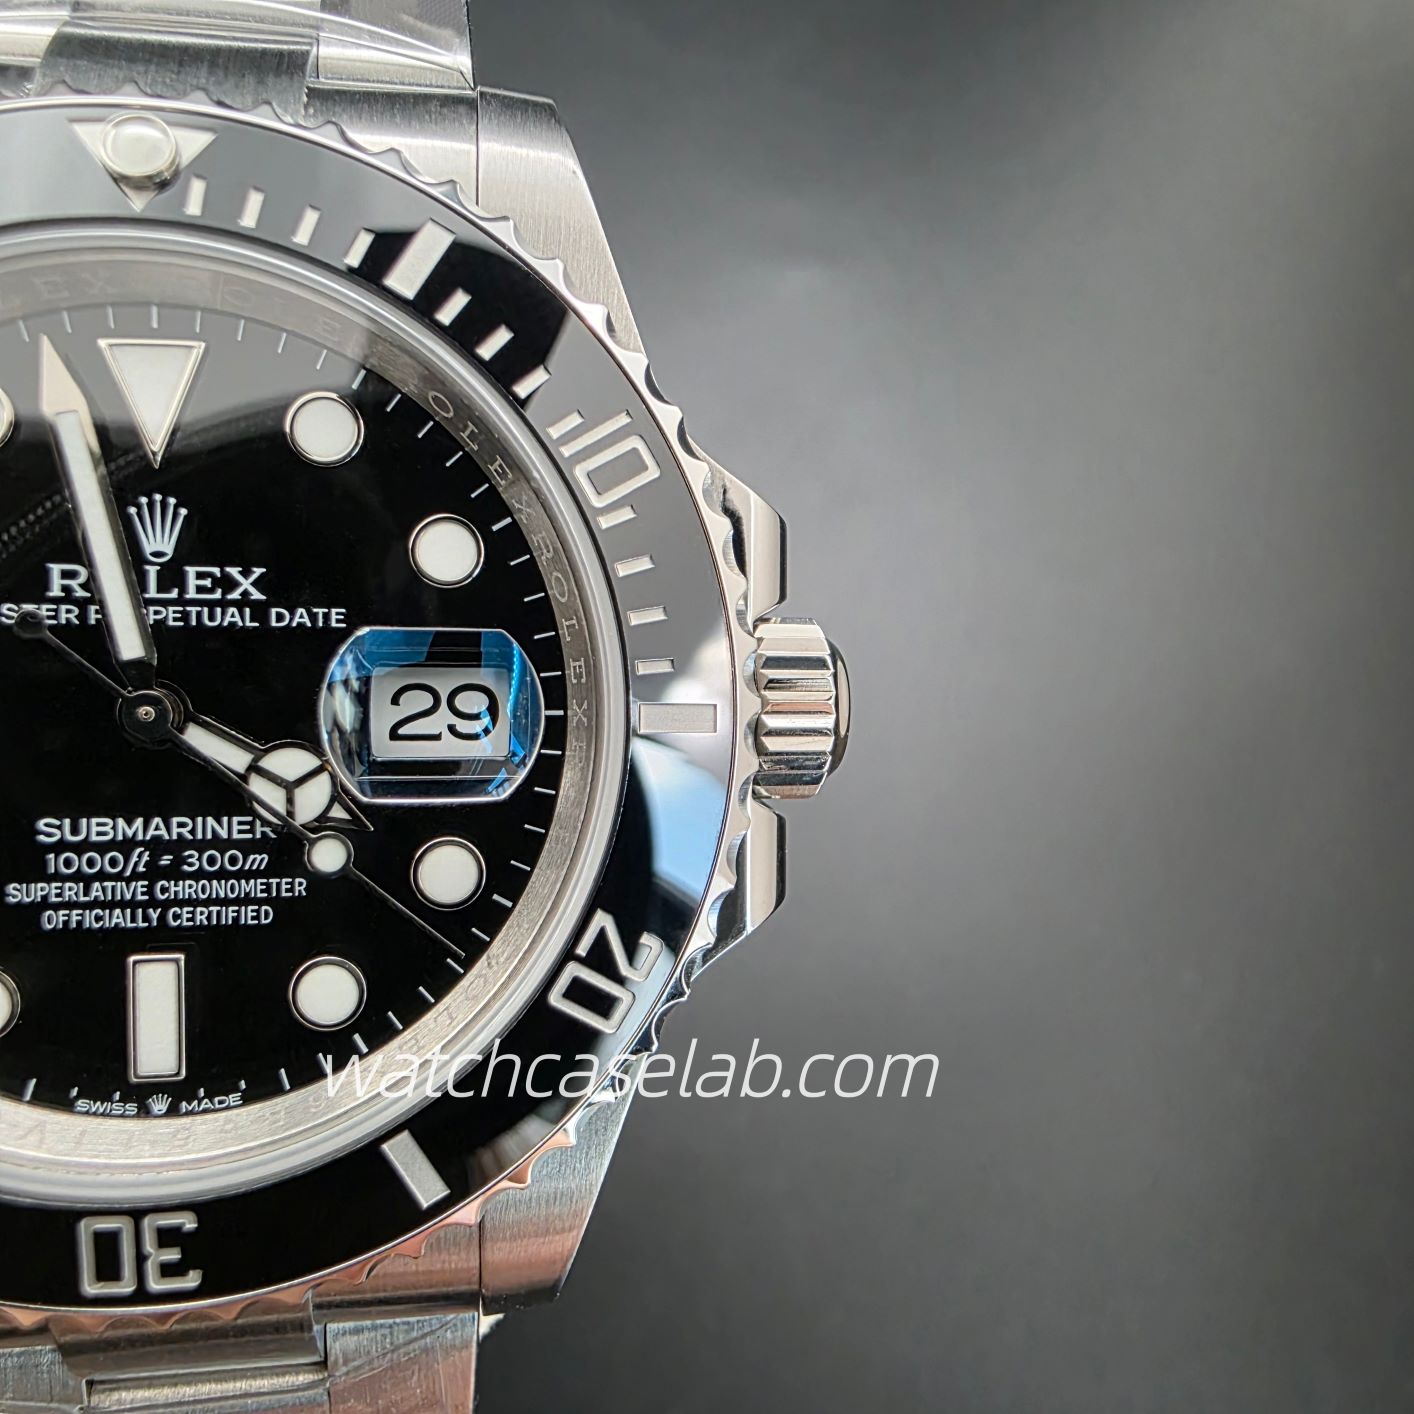
Watch lug profiles describe more than the shape seen beside the dial. From above, you can follow how a lug narrows towards its tip. From the side, you can see how its outline bends down. An angled view connects those two impressions by showing the top and side surfaces together.
Our photographs below show the same VSF Submariner 126610LN replica, photographed by our team at different times. We use three views to follow the lugs from the main case to the bracelet connection.
Identify the lug before reading its profile
The lugs are the projections at the strap or bracelet attachment. NOMOS calls them “horns” in its watch glossary and describes the spring-bar connection between them. On the watch shown here, there are two lugs at twelve o’clock and two at six o’clock, with a bracelet end link between each pair.
Start at the root, where a lug joins the main body of the case, and follow it to the tip, beside the bracelet. Its inner edge faces the end link; its outer edge faces away from it. These landmarks help separate the shape of the lug from the shape of the neighbouring bracelet part.
| Term | What it describes |
|---|---|
| Lug taper | How an individual lug narrows from its root towards its tip in a given view. |
| Lug width | The spacing between a pair of lugs where the strap or bracelet fits. |
| Lug-to-lug length | The overall span from the outer lug tips at twelve o’clock to those at six o’clock. |
A narrow-looking lug does not automatically mean a narrow strap opening. Follow the individual outline first, then look at the space between the pair.
From above: follow the taper towards the tip
In the front photograph, the lugs form four shoulders around the circular bezel. The outer contours draw inward towards the bracelet ends. The visible top surfaces narrow between those outer contours and the seams beside the end links.
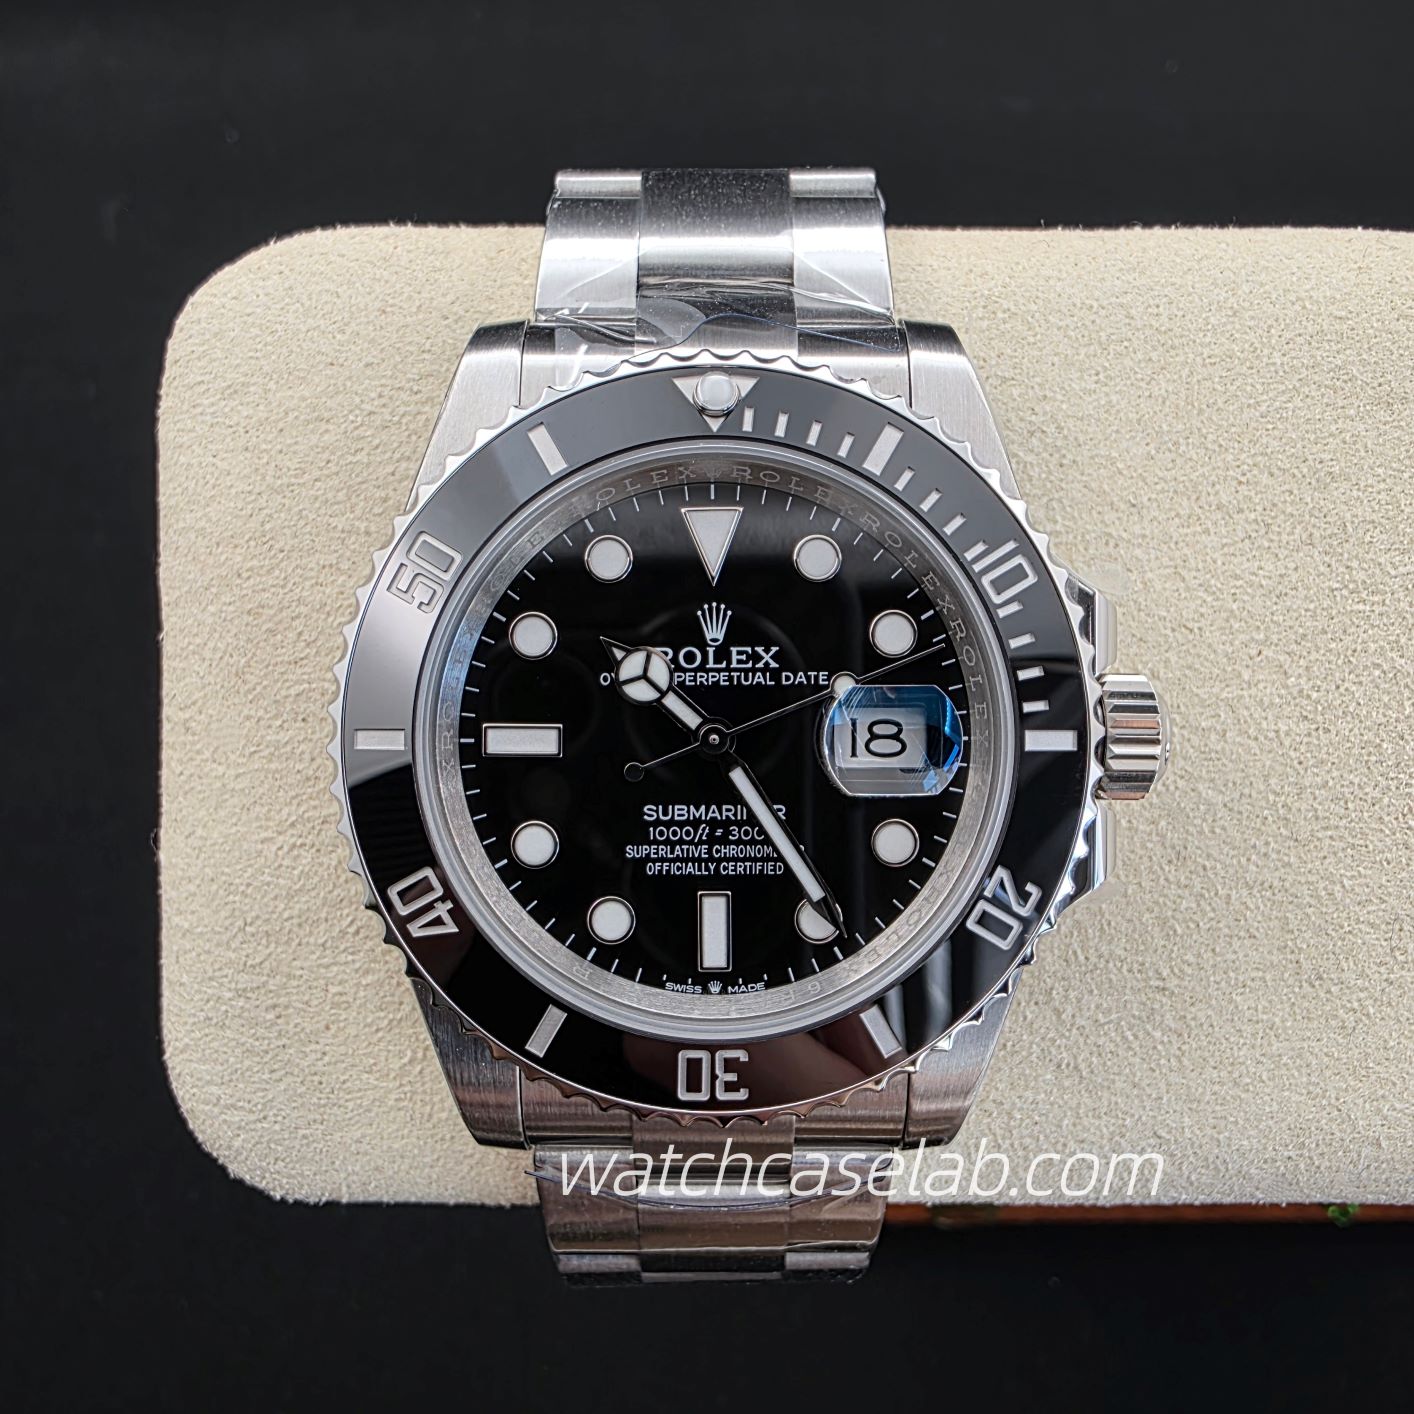
Follow one lug all the way from the case to its end. Look for where the contour begins to turn inward and whether the tip finishes with a rounded corner or a straighter end. A lug can taper along its length while still ending in a broad, rounded tip; taper and tip shape are separate details.
Use the outside silhouette for this first reading. In this photograph, transparent film is visible around the bracelet, so film edges and folds should not be traced as metal boundaries.
From the side: follow the downward curve
A side view answers a different question: how does the lug extend away from the case in height? In the crown-side photograph, look beyond the crown and its guards to the lugs at the far left and right. Their upper outlines sweep down towards the outer tips, while the bezel remains a separate layer above the case.
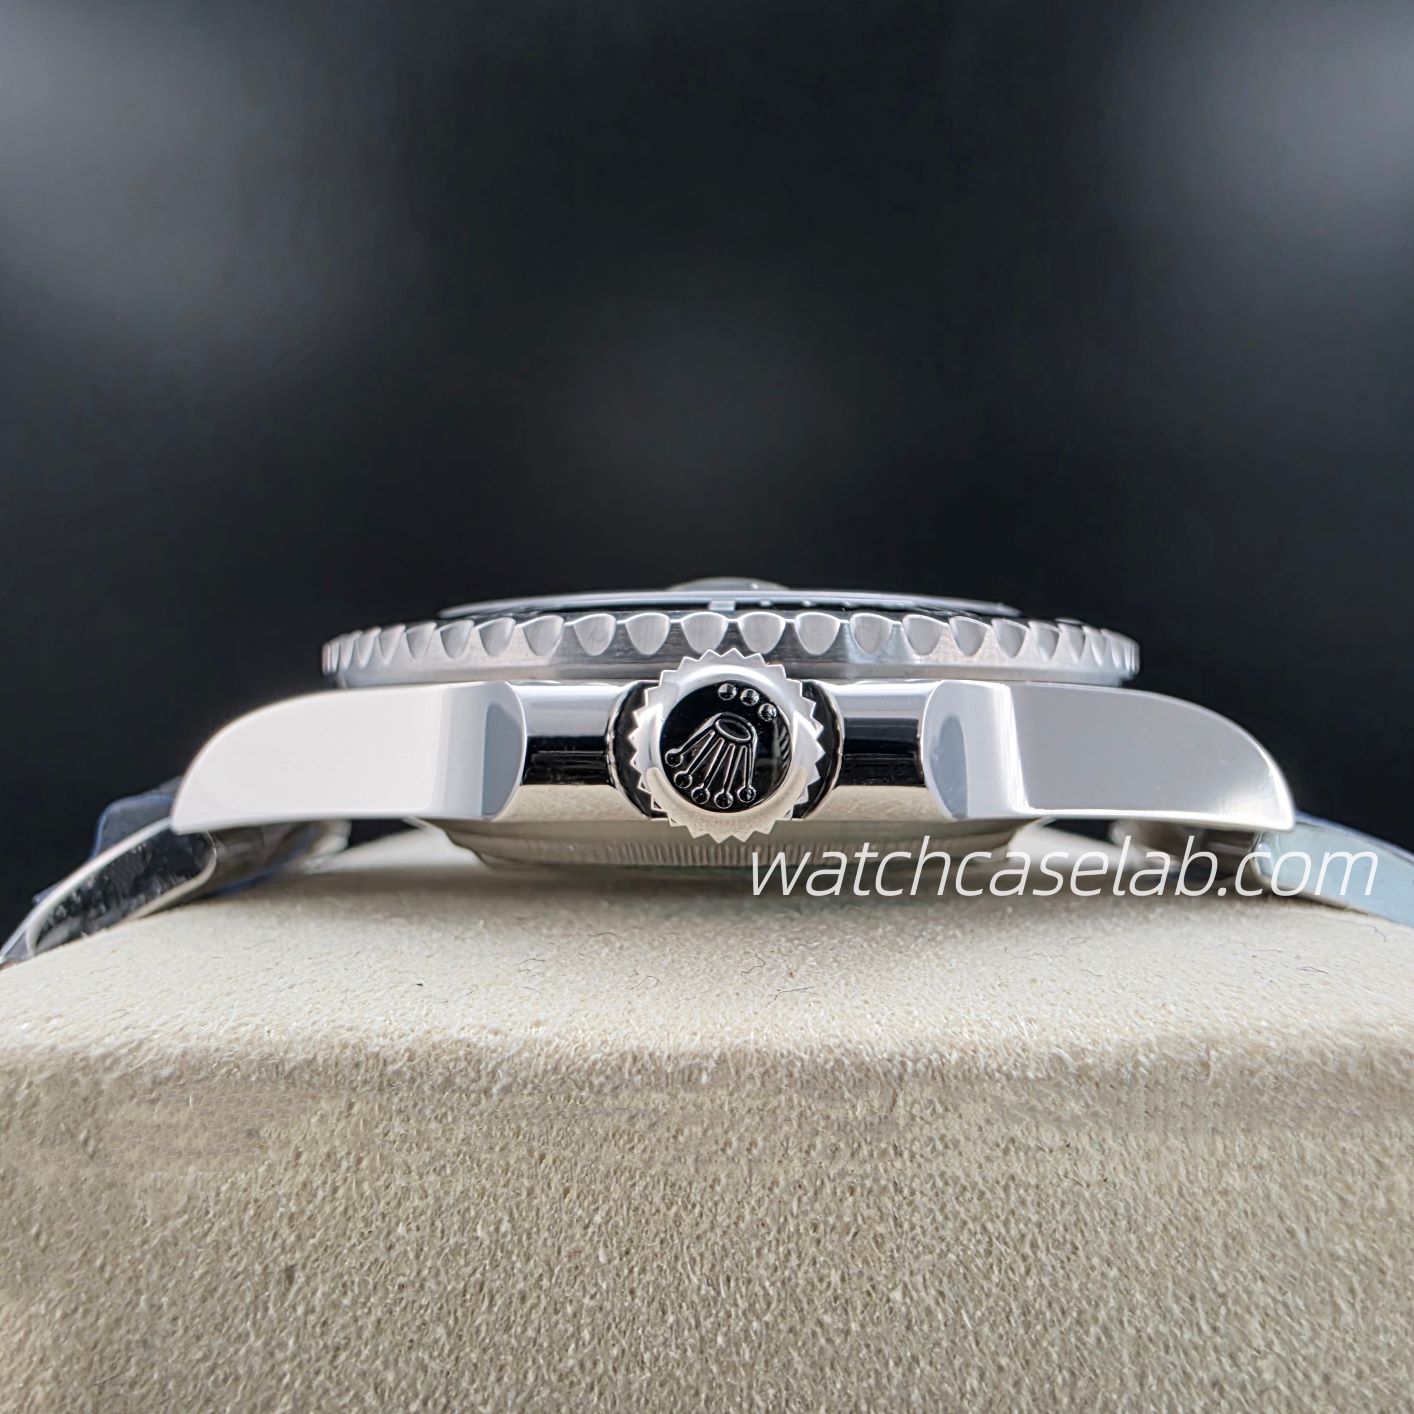
Trace the upper and lower boundaries separately wherever both are visible. Their relationship tells you more about the apparent thickness of the lug than a bright patch in the middle of its side. Here, the bracelet and cushion obscure parts of the underside near the tips, so the upper outline is the clearest path to follow.
A lug that looks relatively straight from above can still curve down noticeably in side view. The first view describes its footprint around the dial; the second describes its vertical profile. Both belong in a useful description of the case.
At an angle: find the top-to-side transition
The oblique photograph brings two surfaces into the same view. On the upper lug in the image, fine grain is visible on the top surface beside the bezel, while the broad side reflects a much smoother field of light. Follow the boundary between these faces from the case towards the end of the lug.
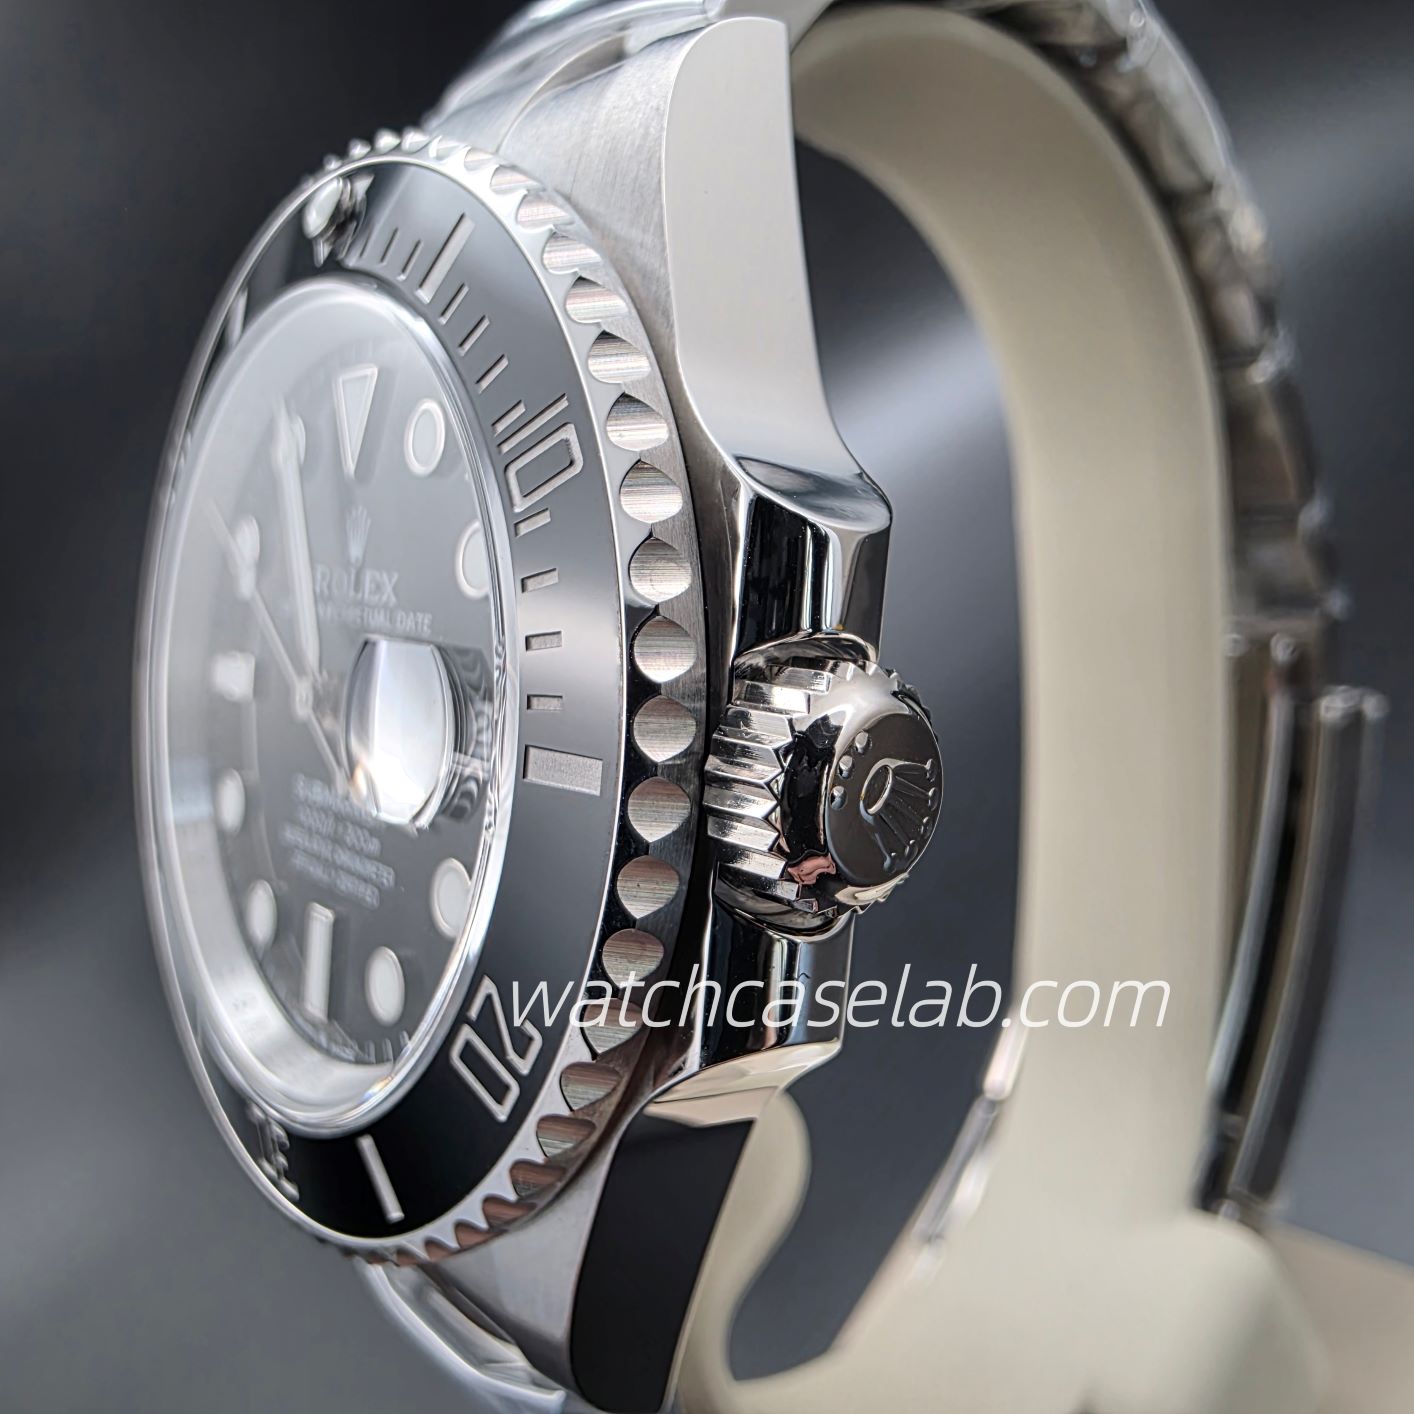
Look for whether the surfaces meet directly, turn through a rounded transition, or have a distinct sloping face between them. That intermediate face is what you would look for when identifying a chamfer. A bright line alone is not enough to describe its width or shape; first locate the surfaces on either side.
As a separate design example, Grand Seiko’s account of its design style discusses flat surfaces, the edges where planes meet and a curved case side. The distinction is useful when reading photographs: a crisp surface junction and a curved side profile can be features of the same case.
For a closer look at grain, polished reflections and bright bands along an edge, see our guide to brushed and polished watch case finishes.
Keep the lug and end link separate
The bracelet can make the lug appear to continue farther than it does. Start at the seam between the end link and the inner side of the lug, then follow the lug’s own outer tip. Similar brushing on adjacent parts can make them look like one continuous surface.
When a bracelet link projects beyond the tips or bends down immediately after them, describe that bracelet shape separately from the case. For the connection itself, use our guide to solid end links and bracelet-to-case fit.
Build a description from three observations
A useful photo note names the view and the feature, rather than calling the whole lug “thick” or “sharp”. For this set of photographs, the observations can be written simply:
- From above: the outer lug contours draw inward towards the bracelet ends.
- From the side: the visible upper outlines curve down towards the lug tips.
- At an angle: the grained top and reflective side meet along a visible surface boundary.
Together, these describe the taper, the downward curve and the surface transition. Keeping those features separate makes it easier to explain why the same lug looks different as the watch turns.
Sources
- NOMOS Glashütte: Watch glossary, “Case lugs (horns)” and “Lug width” — lug terminology and the strap attachment.
- Grand Seiko: Grand Seiko Style — a manufacturer’s discussion of case surfaces, edges and side profile.