Author: adminWatchCaseLab

  • Watch Lug Profiles: Top View, Side View and Edge Transitions

    Watch lug profiles describe more than the shape seen beside the dial. From above, you can follow how a lug narrows towards its tip. From the side, you can see how its outline bends down. An angled view connects those two impressions by showing the top and side surfaces together.

    Our photographs below show the same VSF Submariner 126610LN replica, photographed by our team at different times. We use three views to follow the lugs from the main case to the bracelet connection.

    Identify the lug before reading its profile

    The lugs are the projections at the strap or bracelet attachment. NOMOS calls them “horns” in its watch glossary and describes the spring-bar connection between them. On the watch shown here, there are two lugs at twelve o’clock and two at six o’clock, with a bracelet end link between each pair.

    Start at the root, where a lug joins the main body of the case, and follow it to the tip, beside the bracelet. Its inner edge faces the end link; its outer edge faces away from it. These landmarks help separate the shape of the lug from the shape of the neighbouring bracelet part.

    TermWhat it describes
    Lug taperHow an individual lug narrows from its root towards its tip in a given view.
    Lug widthThe spacing between a pair of lugs where the strap or bracelet fits.
    Lug-to-lug lengthThe overall span from the outer lug tips at twelve o’clock to those at six o’clock.

    A narrow-looking lug does not automatically mean a narrow strap opening. Follow the individual outline first, then look at the space between the pair.

    From above: follow the taper towards the tip

    In the front photograph, the lugs form four shoulders around the circular bezel. The outer contours draw inward towards the bracelet ends. The visible top surfaces narrow between those outer contours and the seams beside the end links.
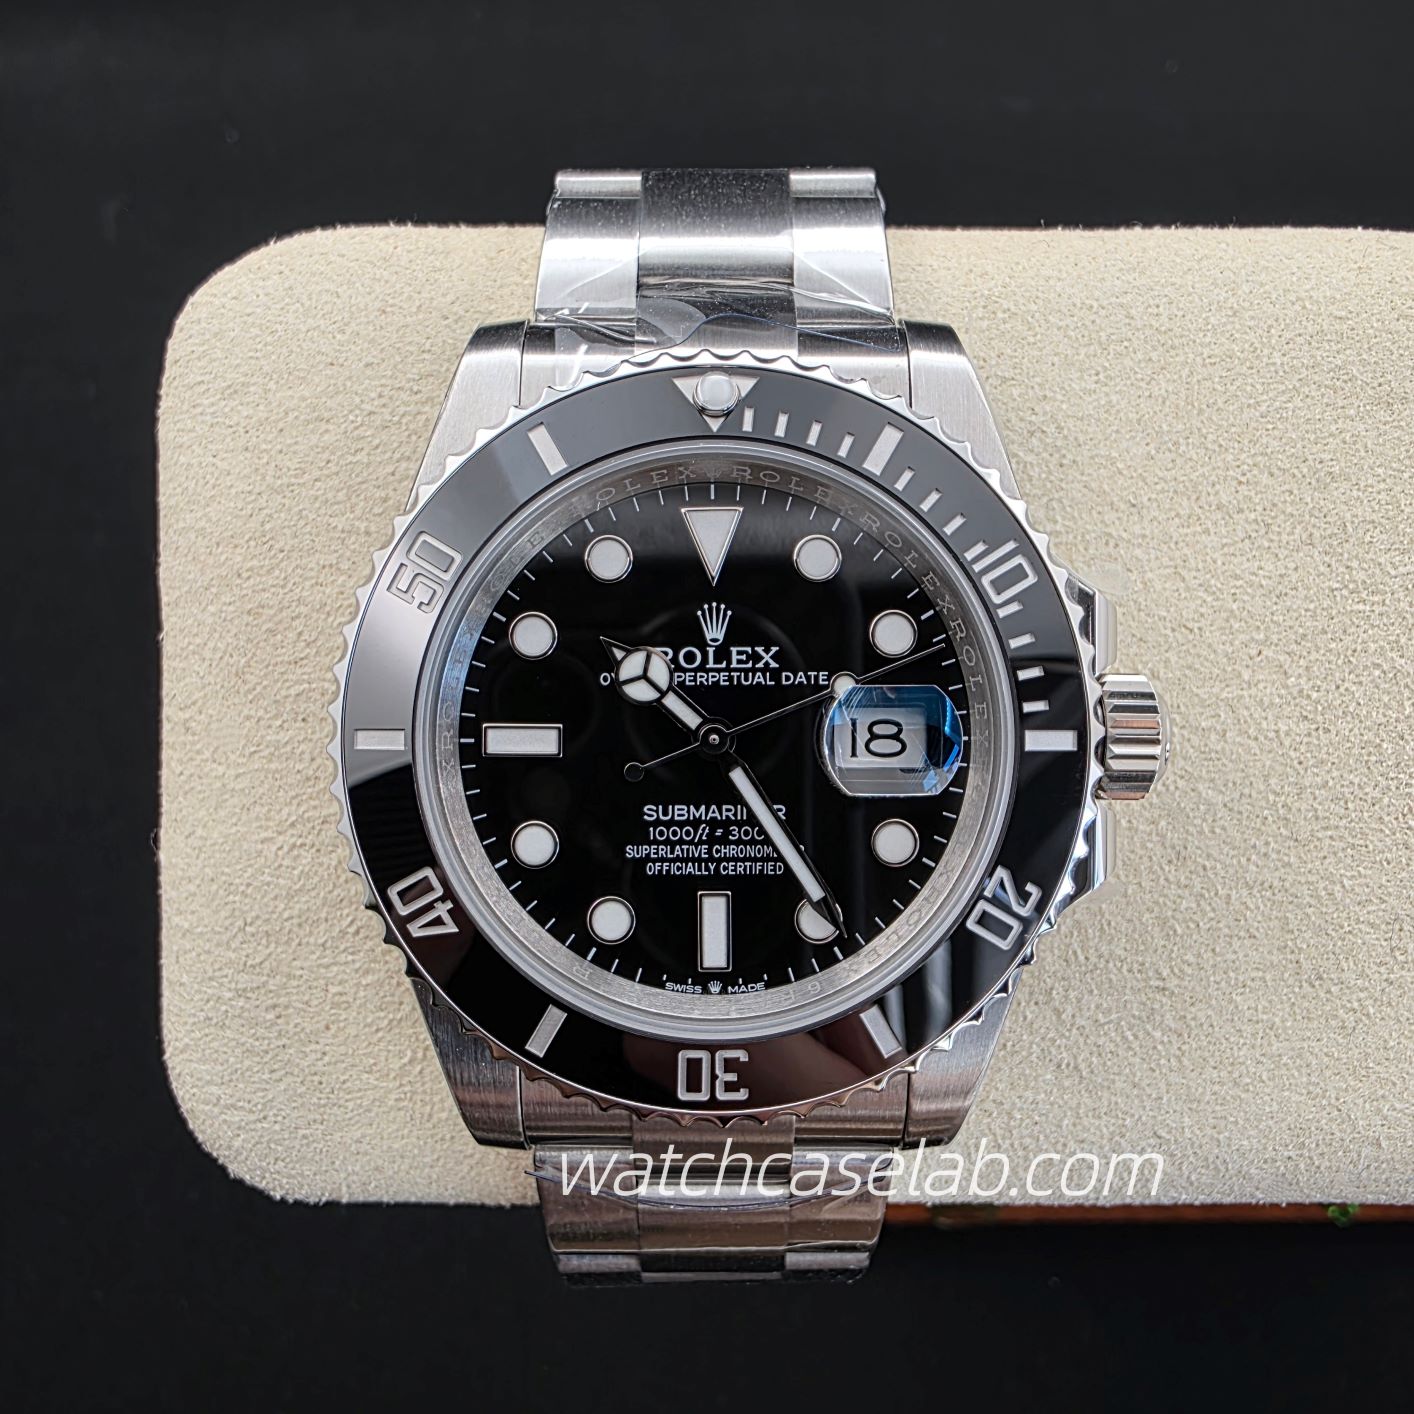
    Front view of a VSF Submariner 126610LN showing the four lugs beside the bracelet end links
    From the dial side, follow the outer contour of each lug towards its tip beside the bracelet.

    Follow one lug all the way from the case to its end. Look for where the contour begins to turn inward and whether the tip finishes with a rounded corner or a straighter end. A lug can taper along its length while still ending in a broad, rounded tip; taper and tip shape are separate details.

    Use the outside silhouette for this first reading. In this photograph, transparent film is visible around the bracelet, so film edges and folds should not be traced as metal boundaries.

    From the side: follow the downward curve

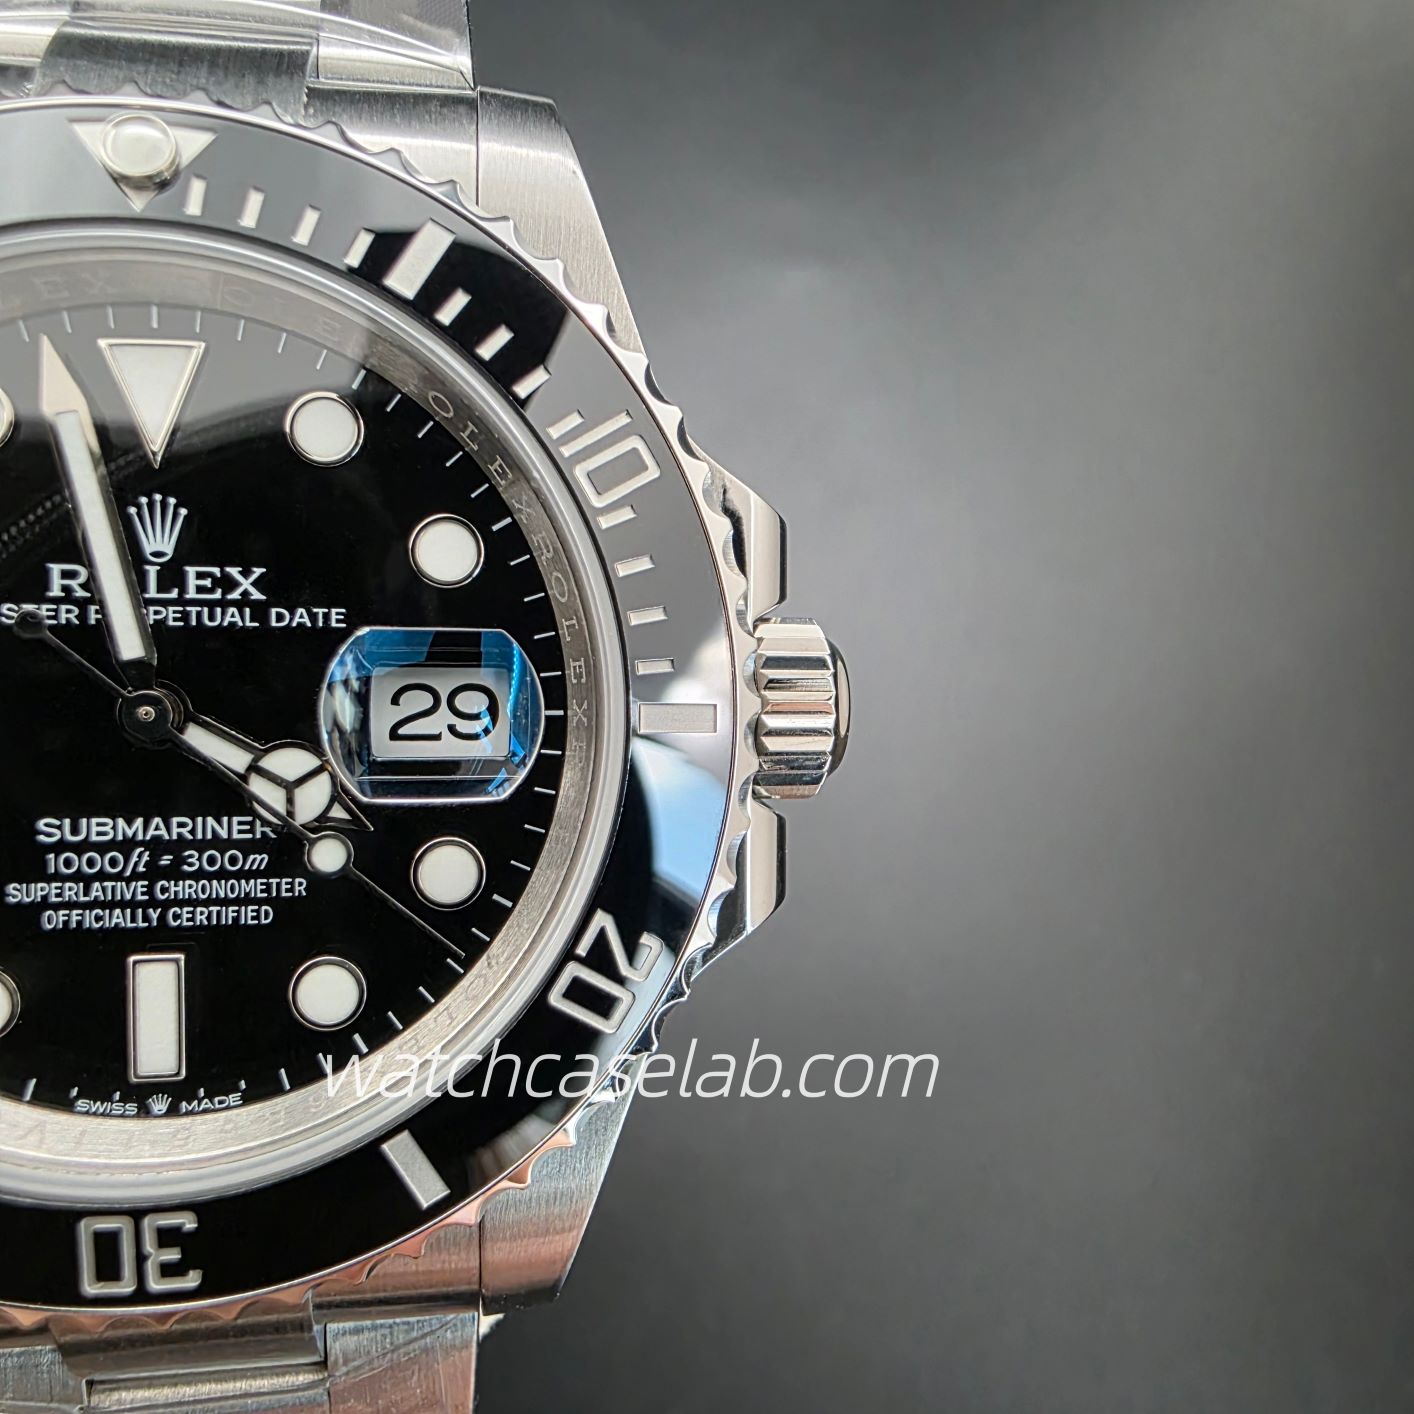
    A side view answers a different question: how does the lug extend away from the case in height? In the crown-side photograph, look beyond the crown and its guards to the lugs at the far left and right. Their upper outlines sweep down towards the outer tips, while the bezel remains a separate layer above the case.
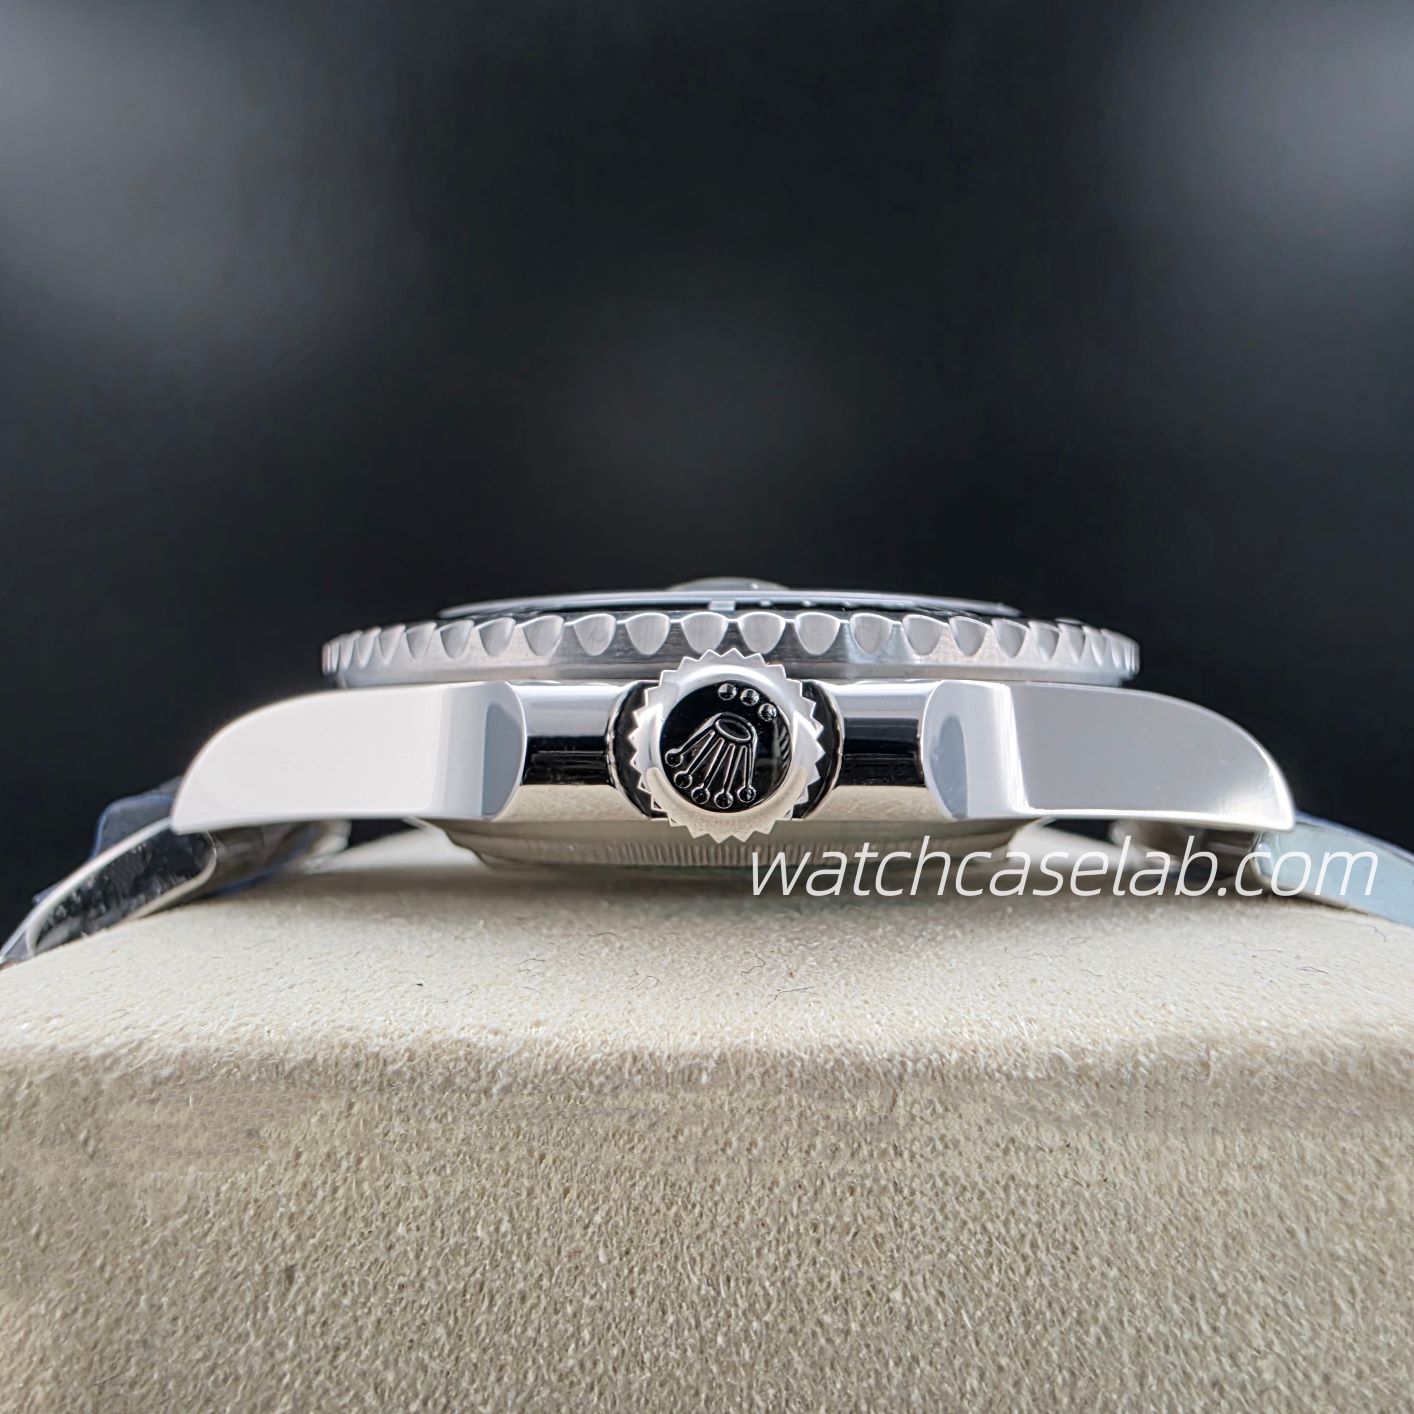
    Crown-side view of a VSF Submariner 126610LN showing the lug profiles at both ends of the case
    The lugs extend to the left and right of the crown. Their upper outlines curve down towards the outer tips.

    Trace the upper and lower boundaries separately wherever both are visible. Their relationship tells you more about the apparent thickness of the lug than a bright patch in the middle of its side. Here, the bracelet and cushion obscure parts of the underside near the tips, so the upper outline is the clearest path to follow.

    A lug that looks relatively straight from above can still curve down noticeably in side view. The first view describes its footprint around the dial; the second describes its vertical profile. Both belong in a useful description of the case.

    At an angle: find the top-to-side transition

    The oblique photograph brings two surfaces into the same view. On the upper lug in the image, fine grain is visible on the top surface beside the bezel, while the broad side reflects a much smoother field of light. Follow the boundary between these faces from the case towards the end of the lug.
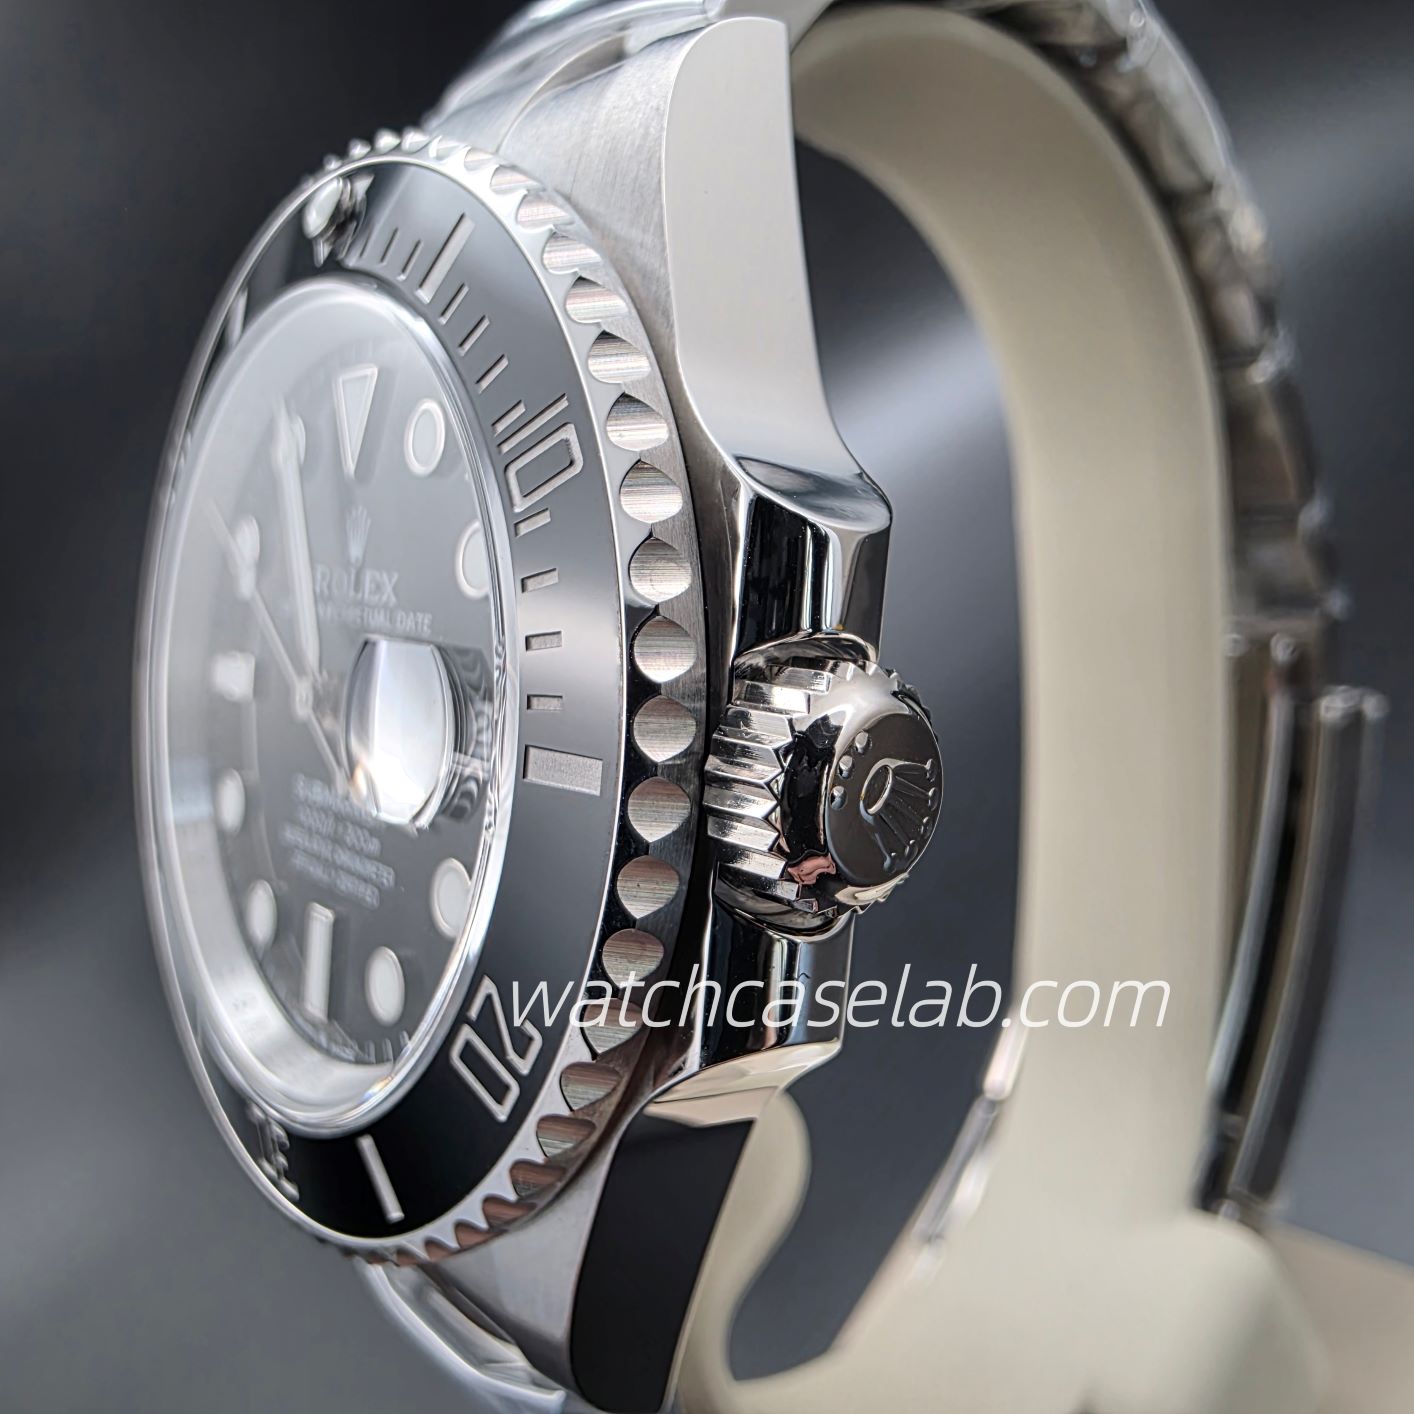
    Oblique view of a VSF Submariner 126610LN showing the brushed lug top beside the reflective case side
    The upper lug shows a grained top surface beside a broad reflective side. Follow their boundary as well as the light on each face.

    Look for whether the surfaces meet directly, turn through a rounded transition, or have a distinct sloping face between them. That intermediate face is what you would look for when identifying a chamfer. A bright line alone is not enough to describe its width or shape; first locate the surfaces on either side.

    As a separate design example, Grand Seiko’s account of its design style discusses flat surfaces, the edges where planes meet and a curved case side. The distinction is useful when reading photographs: a crisp surface junction and a curved side profile can be features of the same case.

    For a closer look at grain, polished reflections and bright bands along an edge, see our guide to brushed and polished watch case finishes.

    Keep the lug and end link separate

    The bracelet can make the lug appear to continue farther than it does. Start at the seam between the end link and the inner side of the lug, then follow the lug’s own outer tip. Similar brushing on adjacent parts can make them look like one continuous surface.

    When a bracelet link projects beyond the tips or bends down immediately after them, describe that bracelet shape separately from the case. For the connection itself, use our guide to solid end links and bracelet-to-case fit.

    Build a description from three observations

    A useful photo note names the view and the feature, rather than calling the whole lug “thick” or “sharp”. For this set of photographs, the observations can be written simply:

    • From above: the outer lug contours draw inward towards the bracelet ends.
    • From the side: the visible upper outlines curve down towards the lug tips.
    • At an angle: the grained top and reflective side meet along a visible surface boundary.

    Together, these describe the taper, the downward curve and the surface transition. Keeping those features separate makes it easier to explain why the same lug looks different as the watch turns.

    Sources

  • Crown Guards in Watch Photos: Shape, Angle and Perspective

    Watch crown guards are the protective shoulders beside the winding crown. Their outline helps define the crown side of a case, but a close-up can make one guard look broader or longer than the other. To read the shape clearly, start with a view from above, then use a side view and an angled view to understand how the surfaces join.

    The photographs below were taken by our team and show the same VSF Submariner 126610LN replica.

    Front view of a VSF Submariner 126610LN replica with a black dial, black bezel and metal bracelet.
    Our VSF Submariner 126610LN sample, with the crown guards visible on the right side of the case.

    What do crown guards protect?

    The guards flank the crown and help shield it from knocks. Rolex describes its crown guard as part of the middle case, extending the case sides around the winding crown. That is a useful example of the familiar paired-shoulder design: two fixed projections with the crown between them.

    First identify those parts in the photograph. The crown is the control used for winding and setting. The guards belong to the surrounding case structure. The lugs are the projections at the bracelet or strap connections. Keeping these separate makes it easier to follow the line of the case into the guard.

    Follow the base, outline and tip

    Instead of deciding whether a guard looks “thick” at a glance, follow its outline from the case towards the crown. Three areas help describe what you see:

    • The base: where the guard meets the main case side. Look for a gradual curve or a more abrupt change in direction.
    • The outer outline: the edge facing away from the crown. Follow how it narrows, curves or stays broad towards the end.
    • The tip: the end nearest the outer part of the crown. Describe whether the visible outline is rounded, flattened or pointed.

    “Tapered” and “pointed” describe different things. A guard can narrow along its length and still finish with a rounded tip. Likewise, a broad base can lead into a slim end. These descriptions are more useful than treating the whole guard as one block of metal.

    Front close-up of the crown and crown-guard outlines on a VSF Submariner 126610LN replica.
    Viewed from the dial side, the two guards frame the crown and show how their outlines extend from the case.

    Why can one guard look larger?

    In an oblique photograph, the nearer guard can appear larger while the farther one is partly hidden by the crown. The camera may also show the top of one guard and mostly the side of the other. Those are different views of the surfaces, even though they appear together in one image.

    TAMRON explains that camera distance changes perspective, while focal length determines framing. Moving very close can exaggerate differences between near and far parts. Cropping a photograph enlarges the existing view; it does not correct its perspective. For a clearer comparison, move back enough to include the whole crown area, keep the watch centred and retain enough detail to follow both outlines.

    Three views that answer different questions

    From above: the outline beside the dial

    With the dial facing the camera, keep the camera centred over the watch rather than leaning towards one lug. Include the entire crown area. This view helps you follow the two guards out from the case and compare their visible tips. A tight crop that cuts off their bases loses much of that context.

    From the crown side: height and overlap

    Lower the camera towards the level of the crown and look directly at the crown side. This makes the vertical relationship between the crown, the visible guard surfaces and the rest of the case easier to follow. The crown may hide some inner edges. Use the other views to trace those areas rather than treating a hidden edge as a short guard.

    Crown-side view of a VSF Submariner 126610LN replica showing the crown between its guards.
    The crown-side view shows the crown between the guards and the case profile beneath the bezel.

    At an angle: the transition into the case

    A shallow view from above and towards the crown side shows the top and side surfaces together. Follow where the guard blends into the case, then where its surface turns towards the tip. This is useful for understanding a curve or bevel. Read apparent size differences alongside the more centred view.

    Oblique close-up of the crown guards and case side on a VSF Submariner 126610LN replica.
    An oblique view reveals the transition from the case side into the guards and the surfaces around the crown.

    Keep the outline separate from the reflection

    A bright patch can make a guard seem broader, while a dark reflection can conceal part of its surface. Start with the boundary against the background, then follow the visible surface towards the crown. If glare hides an edge, keep the camera still and change the light slightly.

    Soft, diffused light is a useful starting point for small reflective objects, as Nikon explains in its jewelry photography guide. You still want enough contrast to see the outline. For a closer look at bright bands and surface transitions, see our guide to brushed and polished watch cases.

    Comparing two crown-guard photos

    Start with the same watch reference and version, then match the viewing angle, camera distance and crown position as closely as possible. A crown extended for setting changes the space you see beside the guards. Also check whether both tips are in focus and fully inside the frame.

    Compare specific features: the curve at the base, the taper along the outer edge and the shape of the tip. If one side still looks different, check that feature in a second view. That gives you a clearer description of the case than judging symmetry from a single dramatic close-up.

    Sources

  • Brushed and Polished Watch Cases: Grain, Edges and Reflections

    Look at one lug, the arm of the case that holds the bracelet or strap. On its top face, can you follow a fine line from the case toward the tip? On its side, can you recognize the outline of something in the room? The first clue is grain, the second is a reflection. To locate a change of finish, find where one pattern gives way to the other and check the same spot in a second view.

    Read the grain on one face at a time

    Brushing often leaves a field of fine lines running in a common direction. Use the shape of the part to give that direction a name. “The lines run from the base of the lug toward its tip” is more useful than “the lines run down,” which stops making sense as soon as someone rotates the picture. On a round surface, look to see whether the lines follow the rim. A single mark crossing an otherwise regular field tells you little about the direction of the finish.

    A brushed face can catch enough light to look almost white. Steel producer Outokumpu even describes one of its brushed sheet finishes as slightly glossy. Look for a patch where the individual lines are in focus. If the whole lug is a white patch with no detail, that frame leaves the grain direction open.

    Use the shape of a reflection

    A mirror-polished surface can show a recognizable outline, such as the edge of a window or a white card. A dark band on the side of a case may simply be the reflection of a dark sleeve. Try holding a white card beside the watch, outside the frame, and move it slowly. Watch where its edge appears on the case. A curved flank can stretch the reflected edge into a long stripe.

    Describe what you can resolve. “The side reflects the edge of the card” says more than “the side is shinier.” It also leaves room for fine finishing lines that the photograph cannot resolve. You cannot assign a steel grade, an abrasive grit or a roughness value from how bright the stripe looks.

    Trace the boundary from the lug tip back to the case

    Start at the tip, where you can identify the top and side of the lug. Trace the top face back toward the case body. Does its grain stop at the outline of a narrow third face between the top and the side? If that strip is a sloping face joining the top and side, it is a bevel. A change in finish can also occur on a continuous face. In that case, look for the line where the texture changes without assuming the metal changes slope.

    For a documented design example, Audemars Piguet describes how wider case bevels changed the contrast between polished and satin-brushed areas on its 50th-anniversary Royal Oak models, with the Jumbo models excluded from that change. On another watch, establish the shape from its own contours. A bright stripe on a lug is too little evidence to call it a polished bevel.

    Make the second photograph answer one question

    1. Is that stripe a reflection? Support the watch and keep the camera still. Move the card or light sideways, leaving the same lug tip in focus. Compare the stripe against the tip. If it travels across the face, you have located a moving highlight. A finish boundary can remain in place even when the new light makes it hard to see.
    2. Is there a separate face? Return the light to its first position, then lower the camera slightly so the top and side are both visible. Follow the suspected bevel to the tip. If you can still trace only one bright line and cannot see the width of a face, leave the bevel unconfirmed.

    Keep both frames and note which variable changed. For a moving stripe, record where it started and where it ended relative to the lug tip. For a possible finish boundary, name the feature you could still trace after the light moved.

    A short checklist for a case photo

    • Name the part and side, such as the crown-side lug at six o’clock.
    • Describe the grain relative to the part, and the reflection by an outline you can recognize.
    • Follow the apparent boundary to a fixed point in both views.
    • State what remains hidden by glare, focus or the angle. Leave the tool, alloy, refinishing history and quality grade open unless you have separate evidence.

    Sources

    • Outokumpu, Deco range. Its descriptions of brushed and polished stainless sheet illustrate the range of appearances a finish name can cover. Surface finishes.
    • International Molybdenum Association, Practical Guidelines for the Fabrication of Austenitic Stainless Steels, second edition, Table 29. The descriptions of directional texture and mirror reflection concern sheet finishes. Technical guide (PDF).
    • Audemars Piguet, It Takes Time to Create the Extraordinary. The case-design section identifies the Royal Oak models covered by its account of the bevel change. Manufacturer’s account.
  • Solid End Links Explained: Reading the Bracelet-to-Case Fit

    SEL stands for solid end link: the component at the end of a metal bracelet that meets the watch case between the lugs. The lugs belong to the case; the end link belongs to the bracelet. Understanding that distinction makes close-up photographs much easier to read.

    End links, lugs and spring bars

    On a conventional spring-bar attachment, a spring-loaded bar passes through the bracelet end and its tips locate in holes in the lugs. The end link shapes the visible transition; the spring bar provides the attachment. A photograph of a neat connection does not establish that the spring bar is correctly seated.

    A solid end link has a solid metal body rather than a folded shell. It can still contain holes and access cut-outs. Uncle Straps describes its own solid end links as machined from solid metal and its hollow versions as folded steel. That description explains the construction difference without establishing how every manufacturer makes its parts.

    Which gap are you looking at?

    Before judging a dark line, identify the two surfaces beside it. A line between the end link and the inside of a lug is different from the opening between the end link and the first moving bracelet link. The latter belongs to an articulated connection and should not be treated as the same feature.

    Use the following sequence to describe what is visible. It is an observation method, not a set of factory acceptance limits.

    1. Look at the side gaps

    Start with a straight-on view of the connection. Keep both inner lug edges in view. Describe whether the visible lines look similar on each side in that photograph. If one appears wider, take a more centred photograph before attributing the difference to the parts.

    2. Follow the case-facing contour

    Trace the end link where it approaches the case. Look at the relationship between the two outlines rather than judging the darkest patch alone. A curved fitted end link and a straight end piece create different visual transitions; they should not be assessed as though they share one intended shape.

    3. Check the top-surface relationship

    A shallow oblique view helps reveal whether the end-link surface appears above, below or level with the adjacent lug surfaces. A step is a description, not automatically a defect. Interpreting it requires the intended design and the correct bracelet configuration.

    4. Identify the first moving link

    Locate where the bracelet begins to articulate. A still photograph records its position at one moment. If you have the watch, let the bracelet move gently through its normal range without forcing it. A short video can document that movement; it does not substitute for checking the attachment.

    Why angle and lighting change the picture

    Moving the camera changes the perspective: nearer surfaces can appear larger, and an oblique view can hide one edge while exposing another. For comparisons, keep the camera position, distance and watch orientation similar. Use a straight-on view for side relationships and an oblique view for height.

    Light also changes which edges stand out. A bright background can make an opening conspicuous, while a reflection can conceal a boundary. If a line is ambiguous, change the light and take another view. Record the two views without presenting the more flattering one as proof of better fit.

    Does matching lug width guarantee compatibility?

    No. For a fitted curved end link, the case profile and spring-bar hole positions also matter. Uncle Straps identifies both in its compatibility guidance. UNION Glashütte’s 2026 bracelet catalogue similarly limits its rounded solid-end-link bracelets to the listed watch references.

    Check the exact watch and bracelet combination, including the specified attachment hardware. A matching width is a starting point, not evidence that an unlisted combination will fit. Do not force parts together to obtain a cleaner-looking joint.

    Does a good end link need to show no gap?

    This guide does not assign a universal zero-gap requirement or a numerical pass mark. A visible line needs to be interpreted alongside the design, configuration, viewing angle and physical condition. An uncalibrated photograph cannot establish a manufacturing tolerance.

    If the connection moves unexpectedly, the attachment appears insecure or the bracelet binds, have it checked in person. Those questions need more than an attractive photograph. Equally, a single end-link detail cannot authenticate a watch or identify its manufacturer reliably.

    Which photos show end-link fit clearly?

    The most useful set combines a view of the whole watch with three close-ups:

    • The whole watch: shows the case and bracelet together and gives the close-ups context.
    • A centred view at twelve o’clock: keeps the end link and both inner lug edges visible.
    • A separate centred view at six o’clock: shows the connection at the other end of the case.
    • A shallow side view: shows how the top of the end link sits relative to the adjacent lug surfaces.

    For comparisons, keep the camera angle and lighting similar so the same edges remain easy to follow.

    Sources and scope

    This is a general guide to terminology and visual observation. It does not report a test of a particular watch.

  • VSF Day-Date 228239-0033 Replica: Case and End-Link Photo Notes

    We photographed this VSF Day-Date 228239-0033 replica to show how its case sides, lugs and bracelet end links meet. The two oblique views cover the twelve o’clock connection from the crown side and the six o’clock connection from the opposite side. They show the curved case flanks, downward turn of the lugs and rounded bracelet links from complementary angles.

    The sample and this record

    • Sample — VSF Day-Date 228239-0033 replica.
    • Configuration — green dial with Roman numerals, fluted bezel and a bracelet with three rows of rounded link surfaces.
    • Photo setup — the watch rests on a box, with part of the bracelet hanging over its edge. Clear protective film remains on parts of the case and lugs.
    • Record date — November 5, 2026.

    Twelve o’clock connection from the crown side

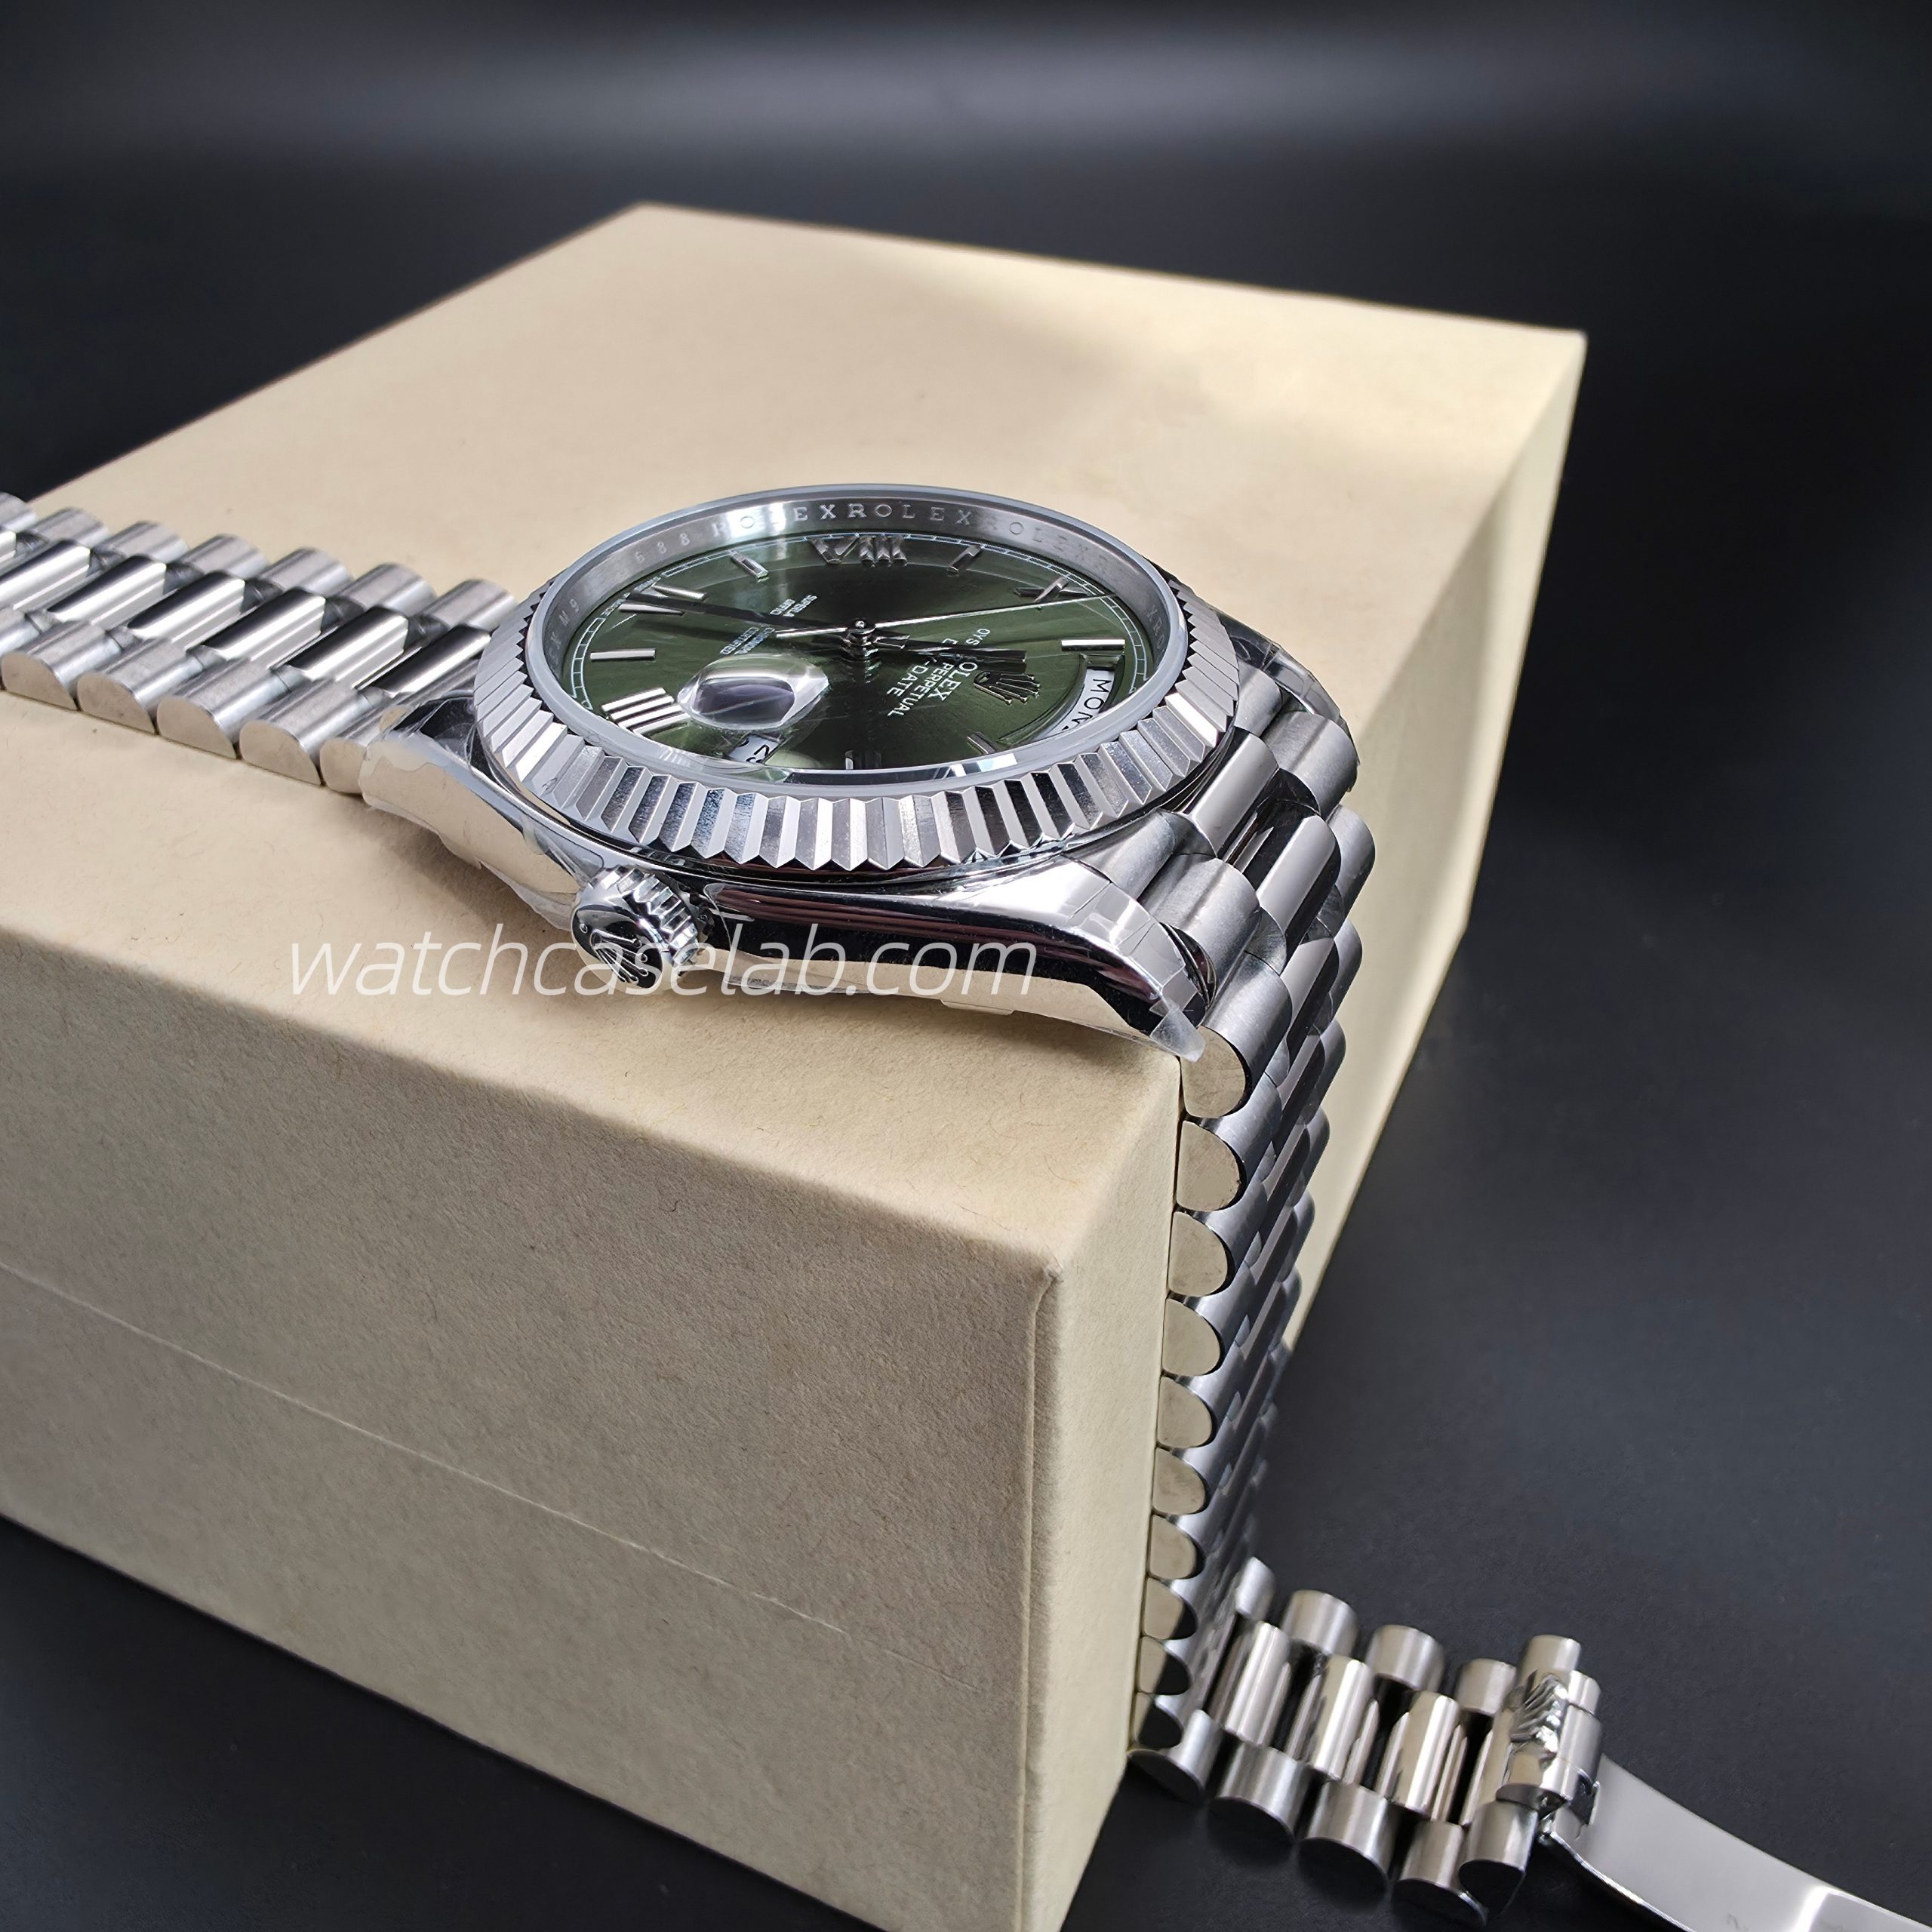
    Crown-side oblique view of the VSF Day-Date replica, with the twelve o’clock lug and bracelet connection in the foreground.
    The twelve o’clock end is at the front-right of this frame. The crown provides a reference for the viewing side, and the bracelet continues down the box edge.

    Starting beside the crown, follow the reflective case flank toward the nearest lug tip. Its outer outline curves downward as it approaches the bracelet. The fitted end piece and the next rounded link surfaces can be followed beyond that tip. Farther along, the bracelet changes direction over the box edge.

    The near lug is the clearest feature in the foreground. Its outer edge gives the eye a continuous line to follow from the case toward the bracelet, where the rounded links break the reflection into a series of shorter highlights.

    Six o’clock connection from the opposite side

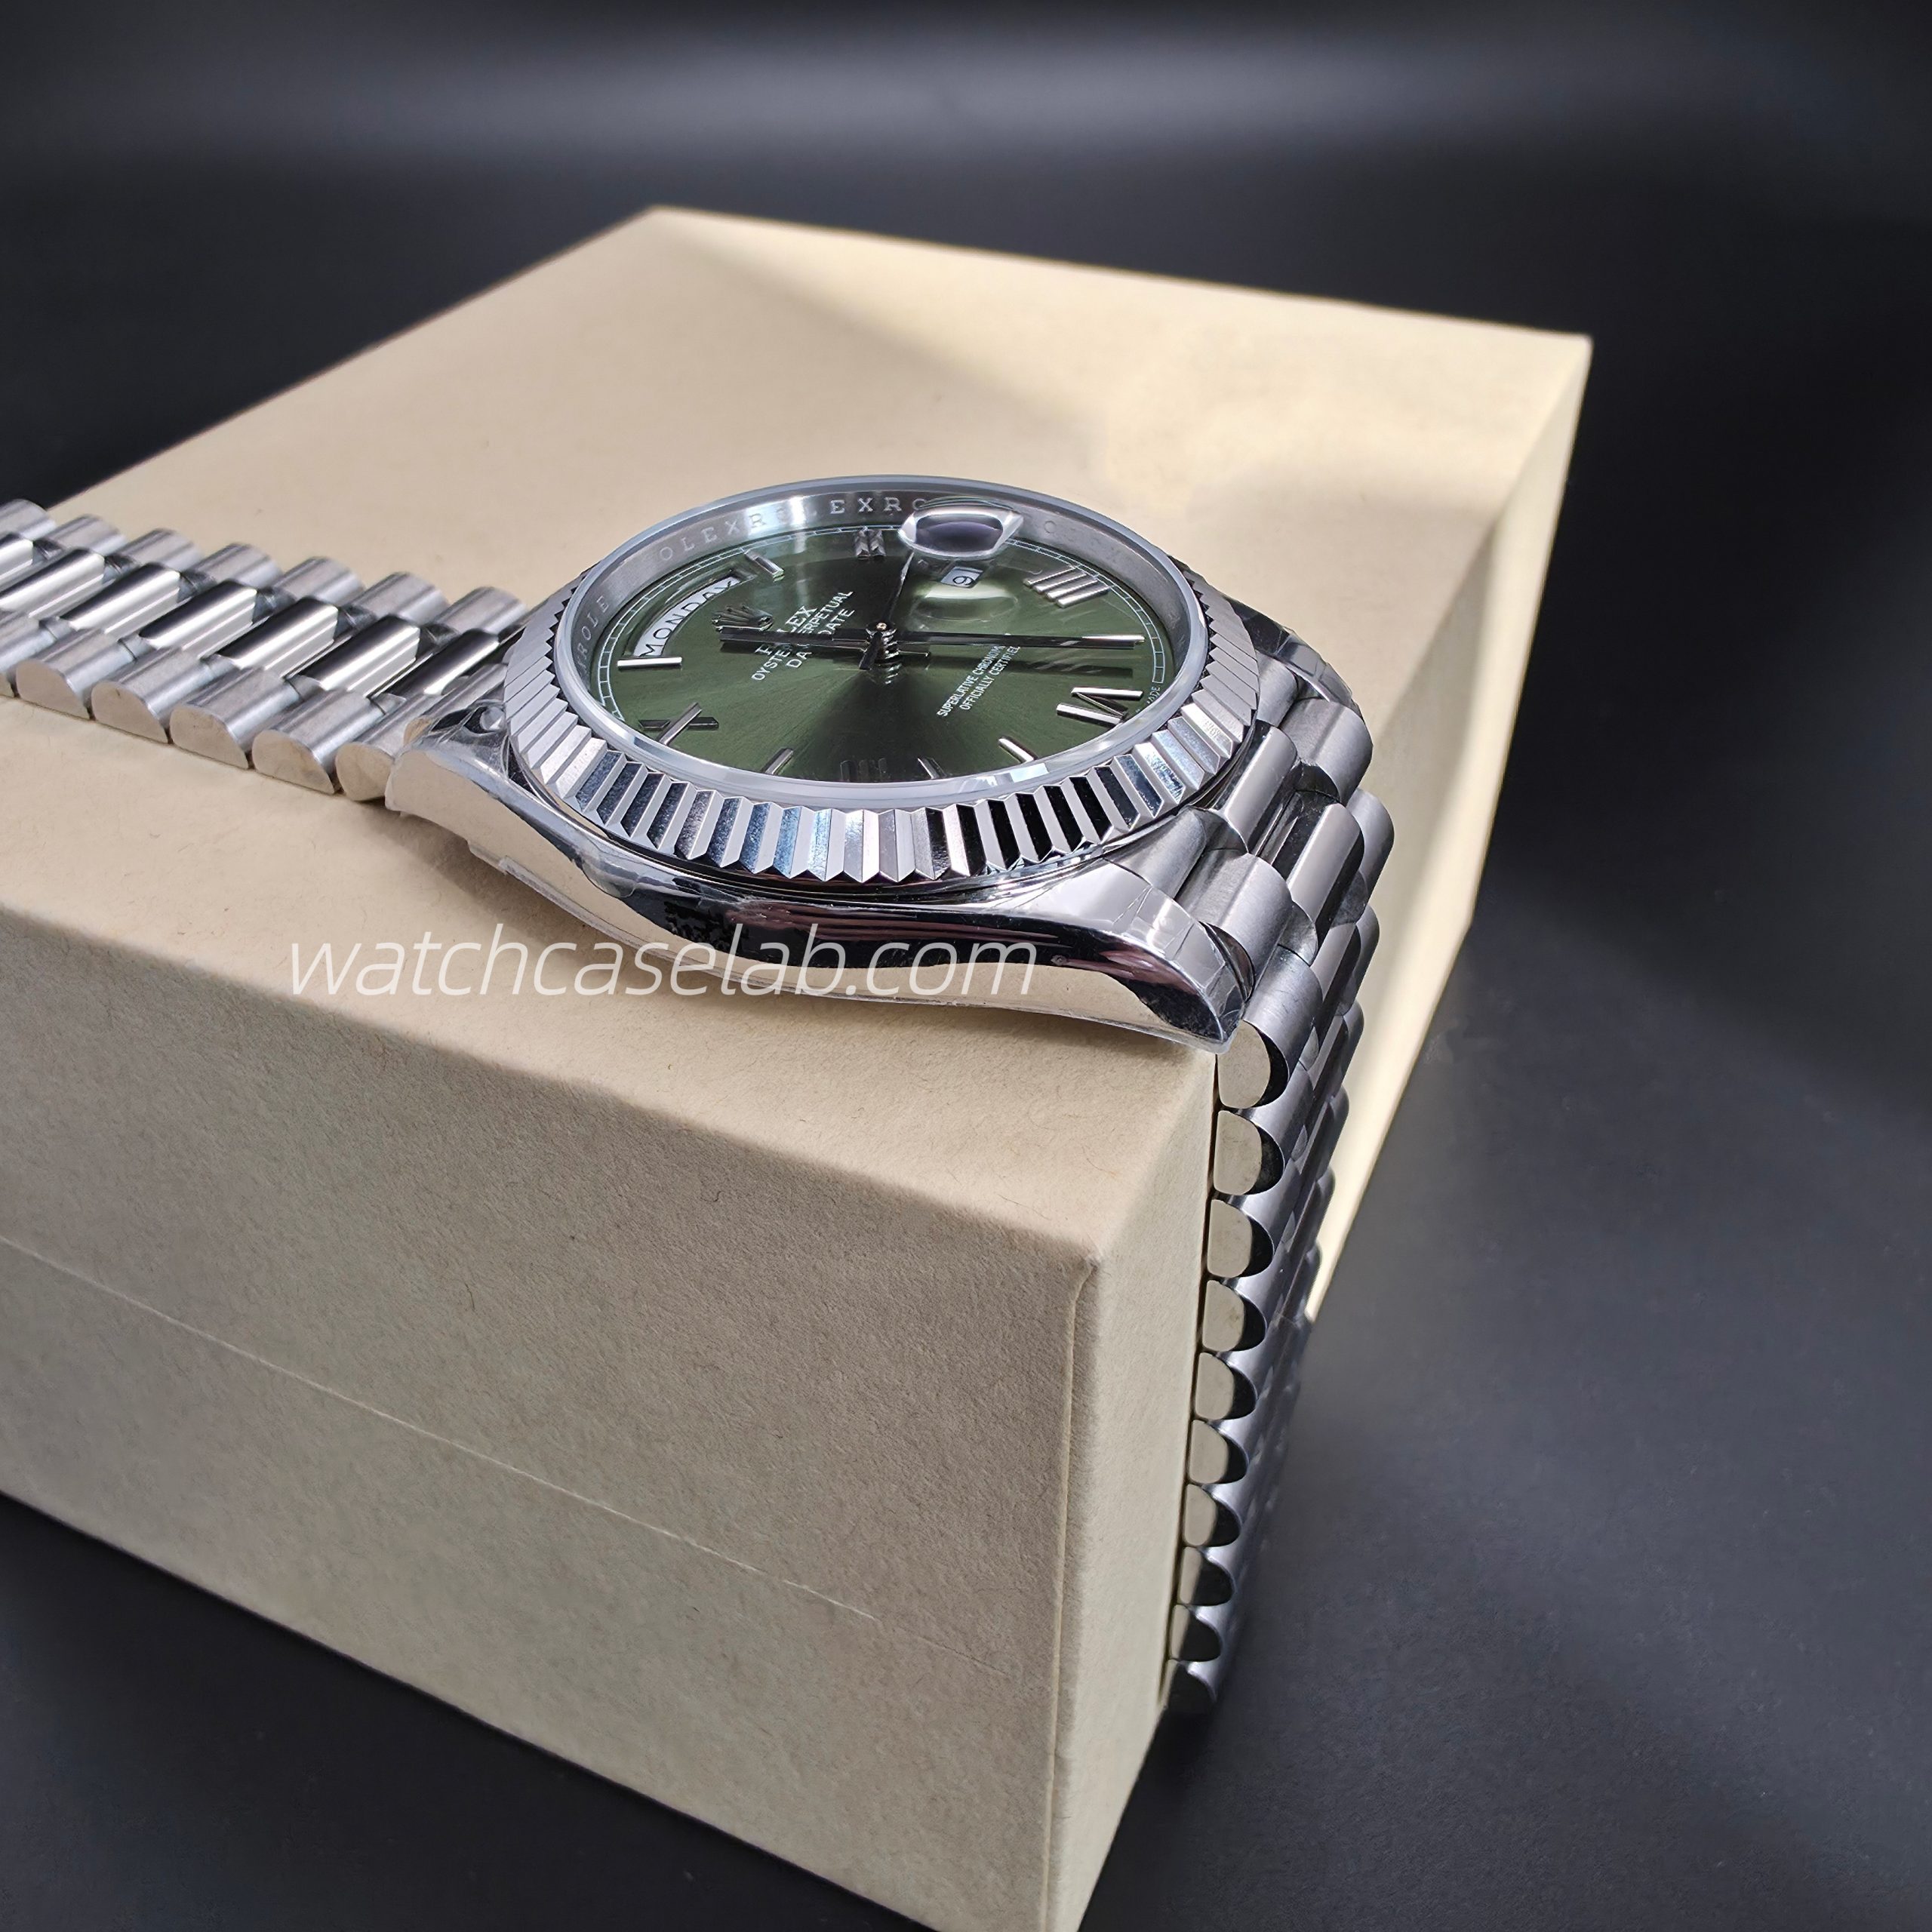
    Oblique view from the side opposite the crown, showing the six o’clock lug and end link on the VSF Day-Date replica.
    The six o’clock end is at the front-right here. This view shows the opposite case flank and the adjoining bracelet beside the box.

    The crown is now on the far side. Along the near flank, a broad reflected band runs below the bezel toward the six o’clock lug. At the front-right, the outline of the lug turns down toward the rounded outer bracelet link surfaces. The centre row catches a different pattern of light from the outer rows.

    This angle makes the opposite case flank easier to follow. Look at the broad surface below the bezel first, then trace its outline toward the lug tip and the adjoining end link. The transition from the larger case surface to the smaller rounded links is the main detail in this view.

    Film edges and reflections around the lugs

    Clear film edges and folds are visible around the case sides and near the lug tips. In the crown-side frame, a translucent tab extends beyond the near lug. In the opposite-side frame, film boundaries can also be followed across the reflective flank.

    The film adds fine edges and wrinkles over the metal. When tracing the lug shape, follow the main outer silhouette and keep those film edges separate. The broad bright bands across the case sides are reflections, which help reveal the curvature of the flank.

    Photography

    All photographs in this article were taken by our team and show the same VSF Day-Date 228239-0033 sample.